To prepare Thunderbird for OmniMix mail interaction open the 'Account Settings' window by
selecting the menu 'Tools' > 'Account Settings' with Windows and OS X or 'Edit' > 'Account Settings' with Linux.
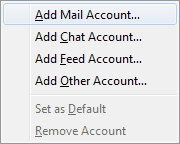
Add a new account by clicking on 'Account Actions'.
From the menu select the 'Add Mail Account ...' item.
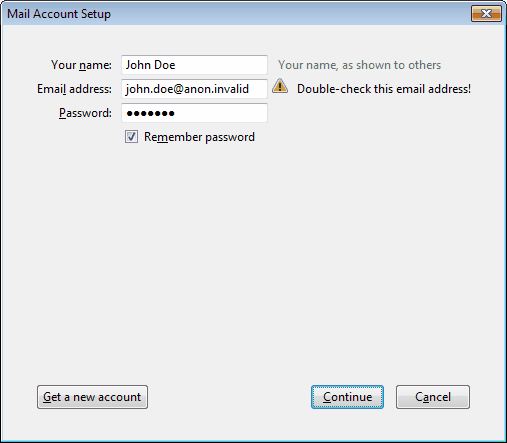
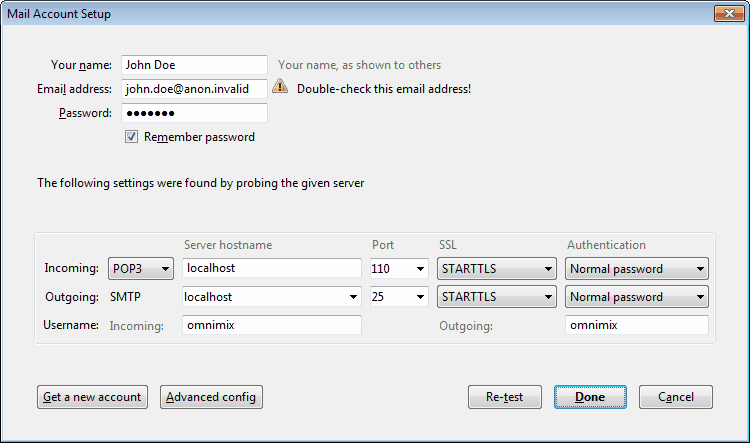
Enter an alias and an invalid email address into the appropriate fields as well as 'omnimix' for your OmniMix password,
check 'Remember password' and click 'Next'.
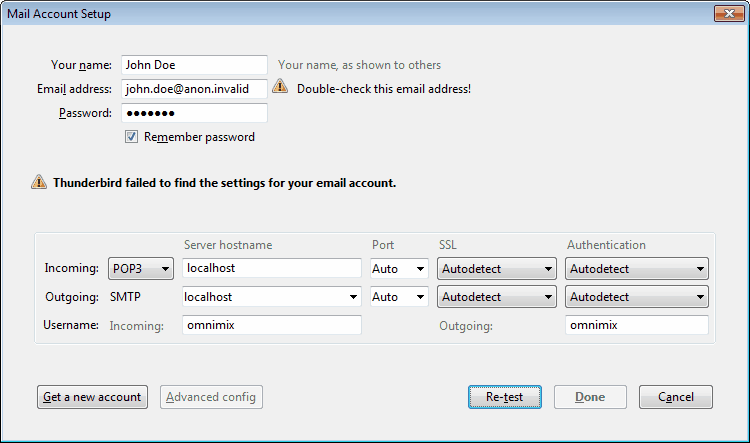
Now Thunderbirds tries to figure out mail server parameters for your mail address, which has to fail, as the address is invalid.
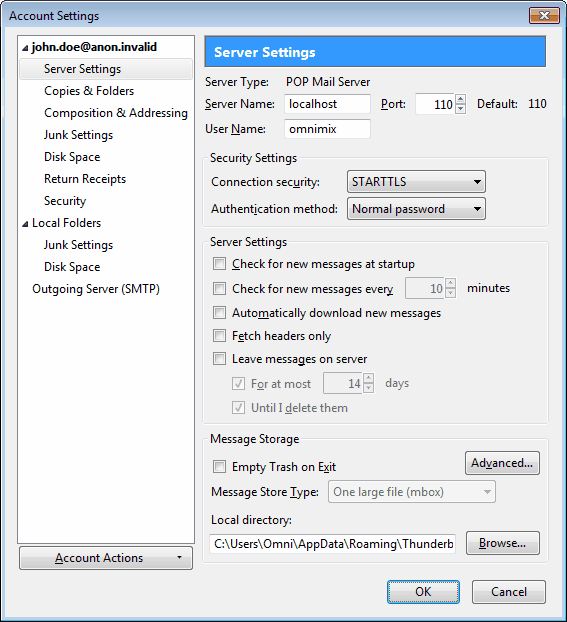
Select 'POP3' for incoming mail, then for Incoming and Outgoing specify 'localhost' as the Server hostname and enter 'omnimix'
into the Username field. Click the 'Re-test' button.
Thunderbird contacts the OmniMix POP3 and SMTP server and finally shows the connection parameters it learned, which are port 110
for POP3, port 25 for SMTP, both with STARTTLS and normal password transmission. Click 'Done'.
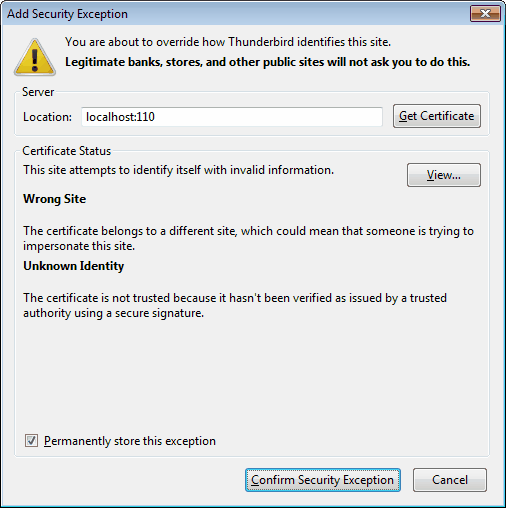
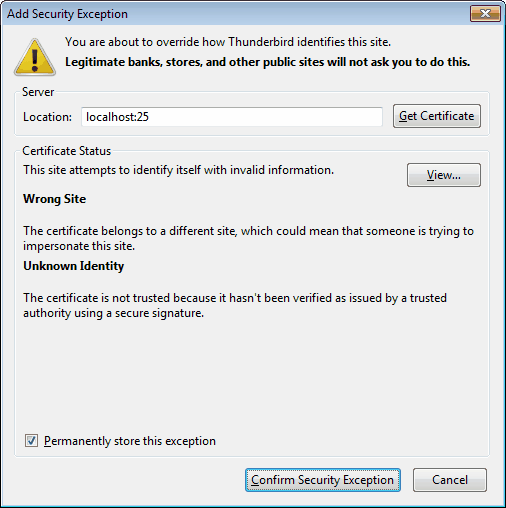
As in default configuration the OmniMix servers use a self-signed certificate you'll get a warning. With 'Permanently store this
exception' checked click 'Confirm Security Exception'.
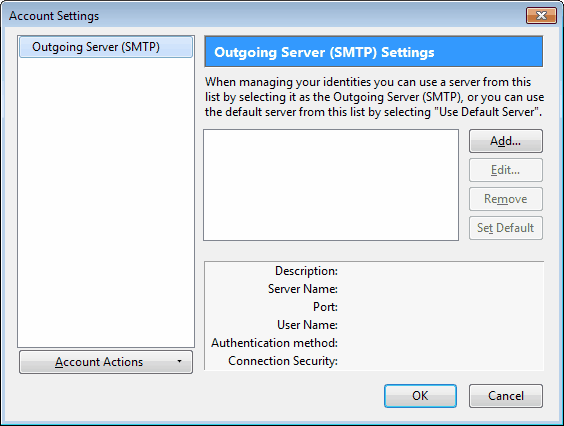
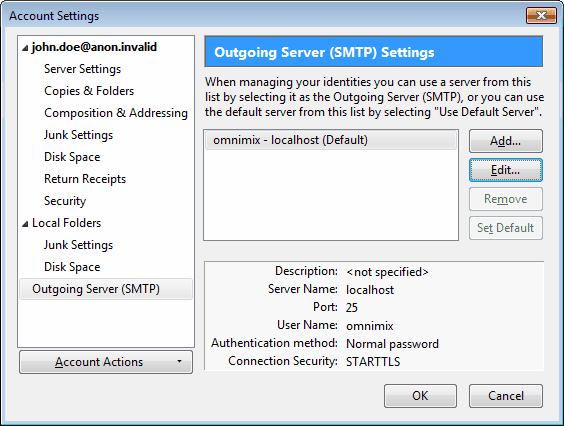
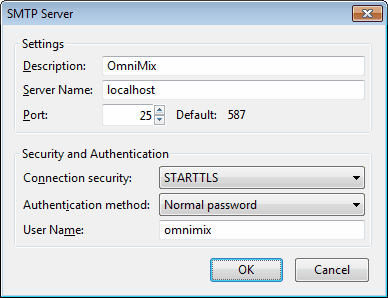
In the 'Accounts Settings' window select 'Outgoing Server (SMTP)', click 'Edit'
and enter a Description,
which reminds you of this account's message routing.
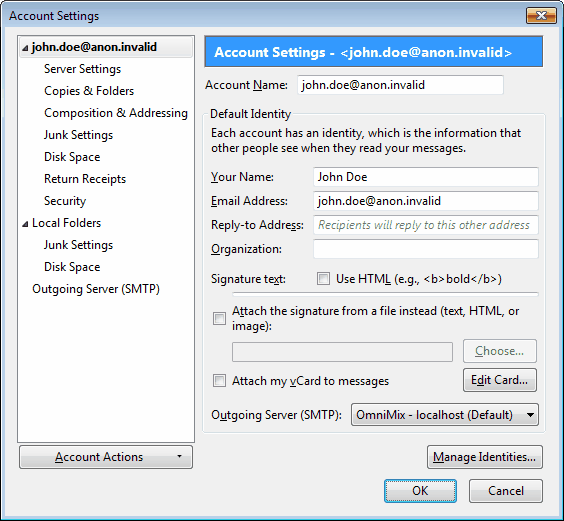
Select the POP3 account of your alias ('john.doe@anon.invalid') to review the data you've entered.
Finally configure its Server Settings, e.g. deactivate automatic checks for new messages.
Mail message retrieval (context menu 'Get Messages' of your POP3 account) either bases on the POP3 configuration within OmniMix,
or you use the 'Extended Username Syntax' to transfer the retrieval rules while
Thunderbird connects with OmniMix. If applicable enter your extended username into the 'User Name' field.
Finally click 'Ok' to finish configuration.
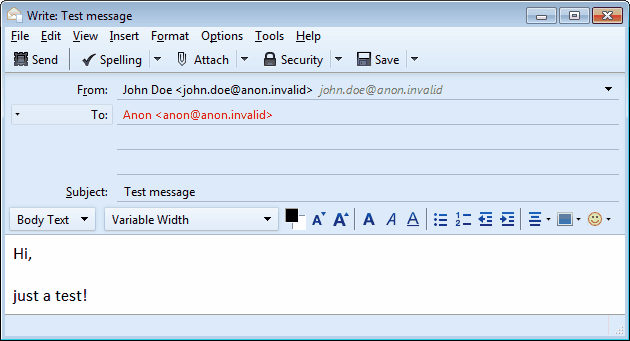
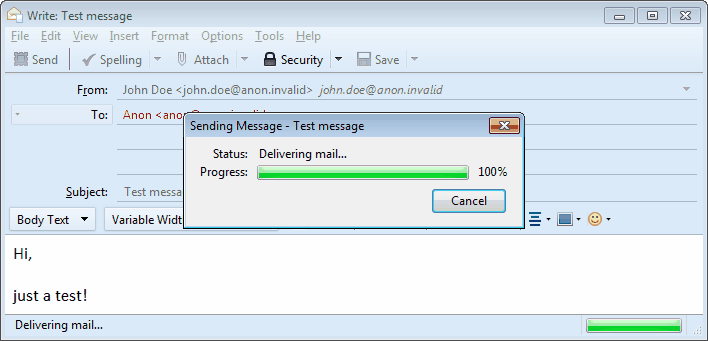
Now it's time to send your first anonymous mail message through OmniMix.
Select 'Message' > 'Mail Mesage' from Thunderbird's menu to open a 'Write:' window, enter a 'To' destination address (for
testing preferably an invalid one), a Subject and Body Text, then click 'Send'.
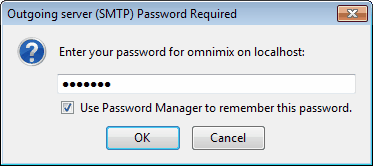
Thunderbird asks for your OmniMix account's password, which defaults to 'omnimix'.
Once again Thunderbird may find fault with your self-signed OmniMix certificate. Click 'Confirm Security Exception' with
'Permanently store this exception' checked.
Thunderbird transfers your mail to OmniMix, then waits for a reply, which may take a few minutes, as OmniMix first has to forward
the message to the Internet.
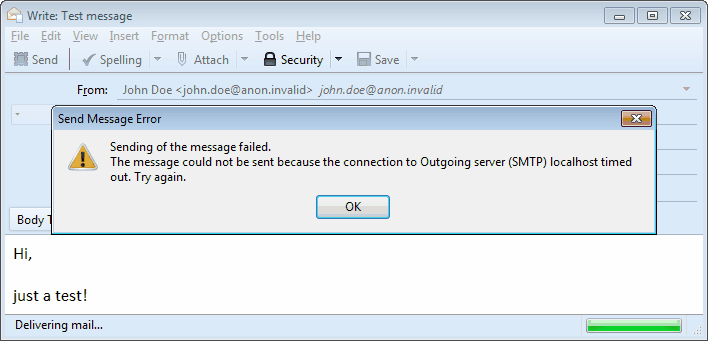
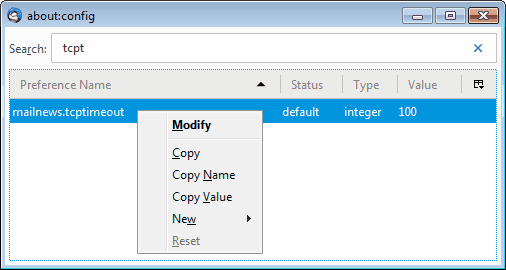
If OmniMix interaction fails due to a connection timeout you have to extend Thunderbird's respective timeout interval, which
unfortunately only can be done with its Config Editor.
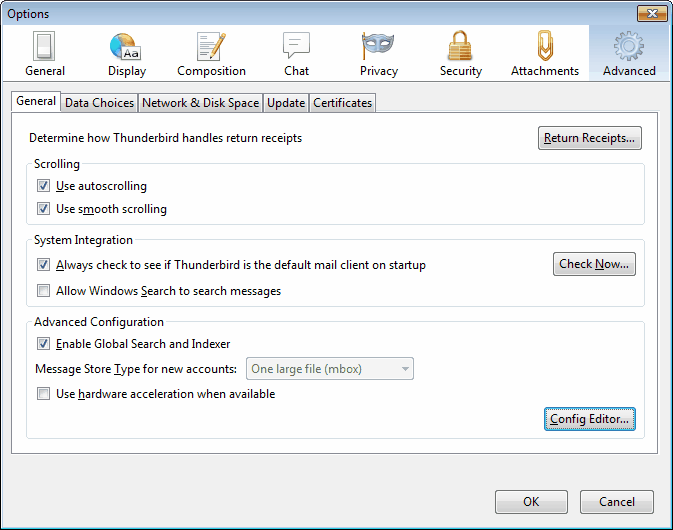
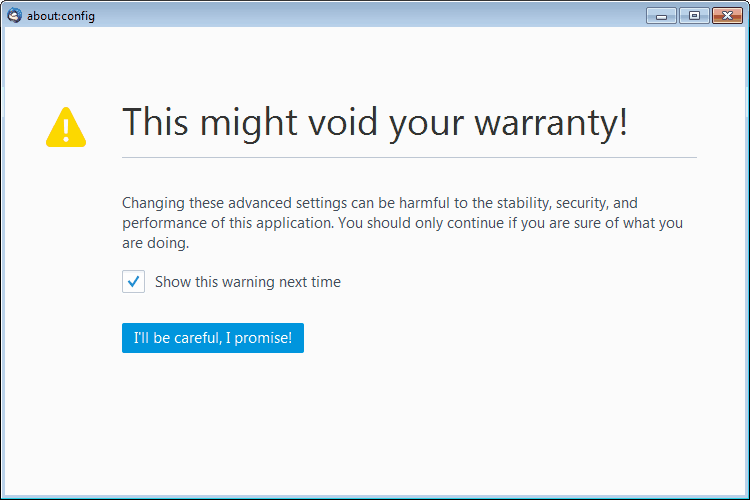
Select the 'Tools' > 'Options' menu, in 'Advanced' > 'General' click the 'Config Editor' button.
A window with a warning opens, confirm your intentions.
Locate the 'mailnews.tcptimeout' parameter by entering that text into the search field, from the line's context menu select 'Modify'.
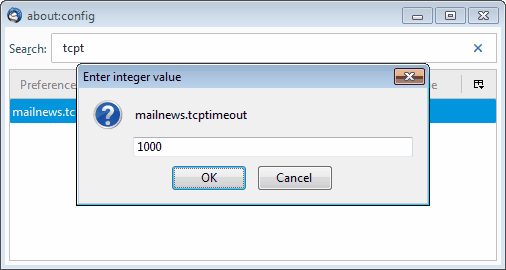
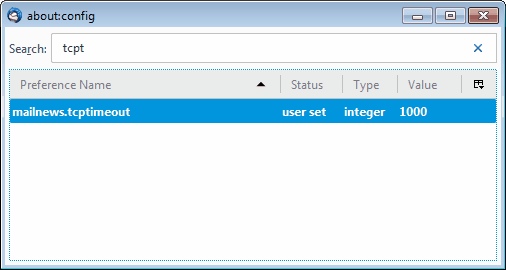
A time interval of 1000 seconds (more than 15 minutes) should usually suffice for OmniMix to get message processing done. Click 'Ok'.
Close the Config Editor, then retry to send the message.